Tuesday, October 24, 2006

Sneaking More Wheat Into You


I'm back--with a few ideas for sneaking more wheat into your meals via wheat berries, since they are so nutritious and since meals otherwise have very few whole grains (unless you eat whole brown, black or red rice every meal-boring).


The first is pizza. That doesn't sound very nutritious at first but lets begin with what you need:
  1. Crust (I use Boboli which I buy and freeze. Also sometimes I use a packaged bread mix or Rhodes frozen dough. Homemade crust is obviously the most delicious besides American Dream, but it is a question of diminishing returns after you spend all that time just to make pizza.)
  2. Sauce (I rotate between tomato or pasta sauce, BBQ sauce, and olive oil, but we use BBQ sauce the most-it's also surprisingly, the cheapest.)
  3. Wheat berries (boiled until soft, in any proportion you desire-or can add without your guests noticing).
  4. Toppings (for example, kalamata olives, cilantro, eggplant, artichoke, peppers, veggie sausage, mushrooms, fresh tomatoes, canned tomatoes, onions, green onions, etc. Whatever you feel like.)
That's all. This is one of the easiest meals in the world actually. My mom makes boboli pizza every Friday night, that's EVERY FRIDAY NIGHT! Imagine how much this simplifies the weekly grocery list and the weekly cooking anxiety. And all it takes is a bunch of yummy veggies and some pre-cooked wheat berries. Anyway, I make pizza about once a month, but for some reason I don't have a pic-so I guess you'll have to imagine what it looks like in all of it's simplicity too!

The second dish you can sneak wheat into is pie. Let's just begin with the crust and I'll throw out some things I've tried. Crust itself can require prohibitive effort, or it can be a matter of no effort at all in exchange for a few dollars. Here are some options:
  1. Make your own crust. I'm sure there are recipes online, some of which require food processors, but I'm not going to link you to them because I don't believe in making crust.
  2. Buy a crust mix. I do this at Winco where they have bulk crust mix (Winco is only available as the name suggests in Washington, Idaho, Nevada, California and Oregon-once again-sorry Utahns) for something like 50 cents a pound. That is delightful! A pound of crust for 50 cents! And it is at least as delicious as I could possibly make myself (knowing my ability to wreck stuff-it is likely far more delicious than a me-made crust). Crust mix also comes in boxes that are surely sold at all grocery stores, even in Utah. You just add a few tablespoons of water and mix it with a fork, then roll it out and cut it into a pie shape. Could it be simpler?
  3. Yes. Buy a pre-made crust. This will cost (at Winco) up to $2.77, but is more delicious (probably at least a little less healthy) and is the simplest of them all. I use Pillsbury.
Now, for the filling. Here are two ideas:
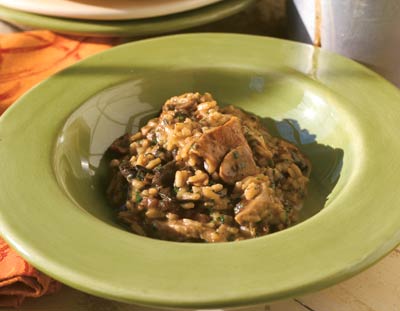
  1. We had some leftover mashed potatoes from Sunday dinner. Now these potatoes had been mashed on Saturday night, and it was already Tuesday. They were rock solid. So I used a pre-made crust and put one layer of crumbly crusty potatoes on the bottom with a bit of Worcestershire sauce (but now that I think about it, BBQ sauce would have been another excellent choice) and on top of that was a layer of frozen (defrosted) mixed veggies, and wheat berries. Then another layer of potatoes with sauce, and repeat veggies and wheat. Then another crust on top with air vents, bake for 40-50 minutes and we came out with the pie in the picture at the beginning of this post (notice the layers). Quite good, and doubtless better if fresh mashed potatoes had been used, but chopped baked potatoes would have been delicious too, (see phyllo strudel post).
  2. Garth's parents have an apple tree and therefore, too many apples for two people to eat. So while we were in Corvallis two weeks ago, we stocked up. Unfortunately we were also unable to eat the apples faster than they were rotting, so I salvaged as many as I could by chopping them all up and making apple pie filling. Now there are exactly one zillion apple pie recipes but they almost all use the same ingredients (I used the one on the Pillsbury box) namely, 6 apples per pie, spices, brown sugar, flour, lemon juice and butter, or "butter." I added a handful of wheat berries to each batch of apple pie filling and froze them. Now I have already had three opportunities to take the frozen crust and filling out of the freezer and throw an apple pie together in 5 minutes (plus the hour to bake). AND, this pie is not only filled with delectable and nutritious fruit, but also you get a handful of wheat berries too. (I actually used Kamut, an ancient Egyptian wheat buried with a mummy, that's appetizing!)

Wednesday, October 04, 2006

More from Squash, Get the Most Out of Your Squash


This is an excellent way to squash (chuckle) every food group into one dish. I like to serve it to guests because after trying it out once, it's really easy and then all you have to make is a dessert- (which is the pear strudel I told you guys I was going to try-I'll put it up later).
You need:
  • two acorn squash, cut in half, cut sides brushed with butter and sprinkled with brown "sugar"
  • a handful of raisins or currants soaked in apple juice.
  • one sour apple chopped
  • a handful of chopped green onions
  • one half of a red pepper chopped
  • cinnamon
  • "butter"
  • a handful of slightly broken cashews (hit the bag with the back of a spoon a few times)
  • one cup vegetable stock
  • one half cup millet
  • salt and pepper
  1. Bake the squash according to the instructions on the last squash post.
  2. While you're baking the squash, put the onions and two table spoons of "butter" in a large saucepan on medium heat for about two minutes.
  3. Add the millet and stir until its all coated with "butter."
  4. Add the apple, the raisins, and the bell pepper and a couple of shakes of cinnamon.
  5. Add the stock and cover the pan, reduce heat to low.
  6. Cook on low for 20 minutes and then remove from heat and let stand for 10 minutes with the cover on.
  7. Add the cashews and a few shakes each salt and pepper.
  8. Spoon the mixture into the fully baked squash shells (that you put in the oven before you started chopping-or about an hour earlier.
  9. Serve. (or you can cook the millet the night before and then bake it inside the squash for the last 15 minutes)
Like I say-this dish gets easier and easier the more times you make it-and it's really filling. Remember to make the most out of your squash.
P.S. Hey you aspiring quilters-check out the product from a quilter with no experience whatsoever.

Monday, September 25, 2006

Nuts and Squash (sounds like spam)


Sorry it's been a few weeks since I've added anything here, I've been busy at work and haven't been cooking as much. Today I just want to add this fun recipe for pecans and walnuts that you can add to green salads, desserts, apple salads, trail mix, etc. Pecans and walnuts are quite expensive (but less so at WinCo Foods- sorry Utahns-where you can buy them bulk) and Dr. Mirkin (check out his excellent Good Foods Book in which he teaches all about eating whole grains) recommends eating them in moderation although they are an excellent source of vitamins, minerals and protein. This recipe is for spicy pecans, but you can alter the Cayenne to taste.

  • 1 cup whole pecans or walnuts
  • 2 Tablespoons water
  • two shakes cayenne pepper

Bake on a cookie sheet or pie tin at 300 degrees for 15-20 minutes.

I'm pretty sure you've seen pecans in salad before, but just in case I added the picture.

Moving on to the squash part of this post, one other great way to use these nuts is on top of baked acorn squash. If you've never baked acorn squash before it is a very tasty yellow (on the inside) veggie, and is also good mashed like yams (as Jessica taught me in Hong Kong). There are baking instructions on the squash label (that is, the little sticker on the rind-think apples) when you buy it at the grocery store, but to eat it with nuts:
  1. Cut the squash in half and slice off a small piece of rind so that it will sit cut side up in a baking dish.
  2. Brush the cut sides with melted "butter" and stick a fork in it to make vents all over the cut surface.
  3. Bake for 40 minutes at 400 degrees.
  4. Pour the unbaked pecan/walnut mix on top of the squash "bowls" drizzling some of the sugar water around the rims.
  5. Bake for another 15 to 20 minutes or until the squash is soft all the way through (use a fork to find out).
  6. Eat with with a spoon, it is really delicious.
Well, that's all for today friends. I have a few more recipes on the docket this week so stay tuned!

Saturday, September 09, 2006

Polenta

Polenta is easy, and it's good because it's made out of the same stuff as cornbread: cornmeal. You can buy it dry labeled as "polenta" or just as plain yellow cornmeal. You can also buy it pre-cooked, and refrigerated- which you can take home and slice into patties and fry in olive oil- which is good- but you can do that yourself at home for a few dollars cheaper, and without extra labor.
  • 1 cup cornmeal
  • 3 cups water
  • a couple of teaspoons of salt or seasoning salt
  • 3 tablespoons Smart Balance "butter"
  • a handful of frozen corn
  • pasta sauce or pico de gallo
  1. Boil the water in a saucepan.
  2. Add the polenta and salt.
  3. Reduce heat and cook for about 15 minutes or until thick (think about the same consistency as oatmeal).
  4. Add frozen corn and "butter" in the last few minutes before turning off burner.
  5. Spoon into bowl(s) and top with pico de gallo or pizza sauce.
I like pico de gallo on polenta, but Garth doesn't like to go that spicy, so sometimes while the polenta is cooking, I throw an 8oz can of diced tomatoes, the same amount of fresh sliced mushrooms, half an onion chopped and some Italian spices in a frying pan and let that all simmer while the polenta is cooking. Then I put all of that over spaghetti sauce on the polenta after it's ready. Basically, the polenta flavor is very versatile, so whatever sauce sounds good-give it a try because it probably will be.

An alternative preparation is to boil the polenta as above omitting adding the frozen corn, but when it's done, instead of eating it, put it in a bread pan in the fridge overnight. The next day, turn the bread pan upside down on a cutting board to get the polenta out. Slice the loaf into 1/2 inch slices and then cut those into 2 inch squares. Fry the squares in olive oil and serve with the same sauces as above. This is for when you don't feel like eating mush. Polenta is not made out of whole grains, it's made out of ground up grains (which is a difference that you slowly start to notice)- so it doesn't have quite as many benefits. I've never tried adding wheat berries to polenta but I think it would be a really good vehicle for getting the wheatberries into a day's diet if someone else wants to try it. No matter what, it is really good for variety and it's a no-brain recipe, so I cook it maybe once a month. Plus it's pretty.

Thursday, August 31, 2006

Deux repas super faciles...

Sadly the next two meals have no pictures, but they are easy to imagine- and cook.

"Nachos"
Really these "nachos" are rainbow bean dip, but my mom always called them "nachos," anyway all you need is:
  1. 1 can refried beans
  2. 1 can black beans
  3. 1 packet nacho, fajita or enchilada flavoring (next to the pesto and gravy mixes at the supermarket)
  4. 1 red pepper, chopped
  5. a handful of frozen corn, thawed and drained
  6. a handful of sliced black olives
  7. a handful of chopped green onions
  8. a handful of fresh cilantro
  9. a chopped tomato or two
  10. maybe some guacamole
  11. a handful of cooked wheatberries

Ok, I usually cook this in a bread pan, but you can use a small casserole or a cast iron skillet if you want. First, empty the can of refried beans in the pan and pour in the nacho flavoring packet and the wheatberries and mix it all up and spread it flat in the bottom. Then pour the can of black beans over the refried layer and spread them flat. Then put all the other veggies in a pretty pattern on top of the black bean layer (for example, I usually put the corn around the outer edge, then a ring of red pepper, then the olives, then the guacamole in the center and the onions and cilantro all over on top). Then bake it all for 15-20 minutes or until the onions and cilantro are looking toasty, and eat it with salsa and Tostitos Scoops or sometimes I cut up a real tortilla into triangle pieces and put them in the oven for about 8 minutes until they're crisp- but it's really hard not to burn them. Anyway, this is a good snack or meal and it gets better with time in the fridge. It also freezes well, except for the onion and cilantro which are better fresh. Sorry no picture, it's actually a very aesthetic dish.

Stuffed Peppers

There are probably a lot of delicious recipes for stuffed peppers out there. For this one, all you need is:

  1. 1 cup of cooked brown whole grain rice (cooked in stock preferably)
  2. 2 red or green peppers (or one of each) cut in half with the seeds scooped out
  3. the same Mexican spice mix from above or a similar one
  4. 1 tiny (4oz) can of tomato paste, or an 80z can of diced tomatoes drained
  5. a handful (1/2 cup) frozen peas or frozen corn or a mixture of both
  6. green onions, cilantro or fresh parsley for on top
  7. a handful of cooked wheatberries (I use a lot of wheatberries in my recipes so I usually cook a big pot of them once in a while and then freeze them in handful size containers, i.e. plastic bags, old plastic containers, tiny Tupperware etc. and then thaw a handful at a time when I need it.)

Ok, once you have all this stuff, mix it all together (except for the peppers and onions/cilantro/parsley of course) while you steam the peppers above boiling water for about 10 minutes (or until the skin starts looking dull). Then put the peppers in a casserole, and fill them with the rice mix, top them with the onions/cilantro/parsley (whatever you picked), then bake them for about 15-20 minutes, or again, until the onions start looking like they are "toasty") and then eat them with another person, (or eat 2 halves now and 2 halves later).

Finally, Garth says, "remember to keep it real."

Oh- I found that I did take a picture of the peppers after all, but these have fresh tomatoes on top with the onions.

Tuesday, August 22, 2006

Phyllo Strudel


Phyllo dough is in the frozen desserts or frozen pastery section at Safeway where I bought the one I used for this recipe. I had never used it before but it was not hard and it made me feel gormet. The thing with phyllo is that you have to have a really big (15X30 in) counter space open, which isn't a big deal, but heads up anyway. Basically with phyllo, you just put a sheet of dough down, brush melted "butter" on it, and then put another sheet down on top of it, "butter" and repeat about 8 times. Then cover the whole sheet with filling, fold the edges over one inch on all sides and then roll the whole thing like a jelly roll and bake it for 20 minutes or until it turns brown. Mine here is kind of blotchy but I was really proud of it. For filling I used:
  • one 8oz can of diced beets
  • two butternut squash chopped and cooked
  • a portobello mushroom, chopped and cooked (in the microwave) with the squash
  • about 1.5 cups frozen vegetable medley thawed
  • a handfull of cooked wheatberries
  • random spices including seasoning salt
  • parsley flakes for spreading on top of the pastry

but you can basically use anything you want for filling. Someday I will do a dessert phyllo and let you all know how it goes. After mixing the filling, spread it out evenly on the layered phyllo sheets, then roll it up (see above) and cut 5-7 vents in the top with a sharp knife. Bake it until it's golden, let it sit for 5 minutes and then eat it (all- that is, I don't know how it refridgerates). Have fun!

Monday, August 21, 2006

Mushroom Risotto

This recipe isn't special because it is particularly fast or easy, (although it is not particularly difficult or time consuming either). It's just good, that is, it completely makes up for in taste what it lacks in convenience or ease. It's a good weekend dish if you don't cook everyday- or double it and freeze half.


Serves: 2 people for dinner and 1 lunch the next day


Ingredients:
  • one small bag of dried mushrooms (i.e. shittake or porcini) like about 12 oz (can you have too many mushrooms?)
  • 3/4 cup fresh mushrooms of any type (portobello, or the little blue box kind, or whatever)
  • 3 cups vegetable stock
  • 3 tablespoons Smart Balance Buttery Spread
  • 1/2 cup chopped onion
  • 1 clove garlic, pressed or minced
  • 1 teaspoon basil
  • a little bit of pepper
  • 1/2 cup short grain rice
  • 1/2 cup long grain or brown rice (I used the Trader Joe's Brown Rice Medley and it was pretty good)
  1. First you have to soak the dried mushrooms in boiling water according to the packaging (somewhere between 15 to 30 minutes) so just put them in a bowl, go do something else and then come back- I don't count that as cooking time. By the way, you can buy these mushrooms somewhere in the grocery store I'm sure, but I always buy them at Asian grocery stores in the dried mushroom section, so I don't know where they are in Safeway.
  2. Boil the vegetable broth in one saucepan while melting the "butter" in another (I know, 2 pans!)
  3. Chop the mushrooms and onions and cook them with the spices in the "butter" for about 5 minutes.
  4. Add the rice to the mushroom/onion/spice/butter mix and cook until the rice is coated with "butter."
  5. Add half the stock to the mix and let it boil off (maybe less than 10 minutes-just watch it in between emails or something), then add the rest of the stock and let that boil off until the rice is a normal consistency, stirring occasionally.
  6. Eat it right away, or put it in the fridge, but make sure it's really hot when you do eat it because that is just really tasty.

This was a winner, plus it was fun to try using the dried mushrooms.

A small circle...

A few people have asked me to share some recipes, but email is the last thing on my mind (right after blogging) when I'm cooking. Hopefully this blog will be a convenient reference for all 3 people who read it. Some disclaimers:
  • The recipes in this blog will respect copyright laws by only representing my own interpretation of other people's ideas.
  • The content of this blog may not be restricted to recipes.
  • This blog will not borrow from anything produced by Rachel Ray (because I cannot guarantee anything I do will take less than 30 minutes) or Martha Stewart although some charisma and creativity may outshine the medium.
  • Most of the recipes I share will have something very significant in common, but there is a slight chance that something else delicious that is "not like the others" may show up accidentally- but that's not very likely.

Ok, I'm just going to get started. I will do my best to categorize the stuff I put up here, by labeling each recipe, and posting a list of labels so you can easily find recipes with a common label (i.e. really easy dishes, really really easy dishes, etc. ) And I will have tried all the recipes I post, so you can email me with questions (if you think it will help) at adria dot tingey at gmail dot com. Shoutout to all my friends and sisters!